Next-Level Car Detailing: Advanced Tips to Achieve a Flawless Finish
Ready to go beyond the basics? These pro-level techniques will take your detailing results from good to jaw-dropping.
You’ve mastered the two-bucket wash and you know your way around a microfiber towel. But if you’re chasing that mirror-like, glass-smooth finish that makes people stop and stare, it’s time to level up. Professional detailers rely on a handful of advanced techniques and tools that make a world of difference — and most of them are accessible to any dedicated enthusiast.
Here’s how to push your detailing to the next level.
1. Perform a Paint Thickness Measurement First
Before you touch a polisher to your car’s paint, invest in a paint thickness gauge (PTG). These handheld devices measure how thick your clear coat is in microns — critical information before any paint correction work.
Aggressive compounding removes a thin layer of clear coat. Do it too many times without checking, and you’ll polish right through to the base coat. A PTG reading tells you how much “headroom” you have, letting you choose the right level of abrasiveness with confidence. It’s a small investment that can save you from an expensive respray.
2. Master Machine Polishing with the Right Pad Pairing
A dual-action (DA) polisher is the enthusiast’s best friend — safer than a rotary for beginners while still being powerful enough for real paint correction. But the real skill lies in pad and compound pairing.
- Heavy cutting pad + compound: for deeper scratches and heavy oxidation
- Medium polishing pad + polish: for light swirls and moderate defects
- Soft finishing pad + fine polish or glaze: for final refinement and gloss enhancement
Always work in 2×2-foot sections, use 4–6 pea-sized drops of product, and keep the machine moving at all times. Check your work under a dedicated LED inspection light or work light — swirls that are invisible in the shade become very obvious under focused light.
3. Use an Iron Remover Before Claying
Most detailers know about clay barring. Fewer know that an iron fallout remover (sometimes called a wheel and paint decontamination spray) should come first.
These pH-activated sprays chemically dissolve iron particles embedded in paint — the same ferrous contamination that causes orange rust speckling on white cars. Spray it on, watch it turn purple as it reacts with iron, then rinse thoroughly. After that, your clay bar will glide more easily, last longer, and remove the remaining organic and industrial contamination far more effectively.
4. Wet Sand for Severe Paint Defects
If a section of paint has deep scratches, severe orange peel texture, or a thick paint run, polishing alone won’t fix it. This is where wet sanding comes in — using ultra-fine sandpaper (typically 1500–3000 grit) with water as a lubricant to level the surface.
Wet sanding removes more material than polishing, so it requires a confident hand and careful preparation. Tape off any edges or trim that could be accidentally sanded through. Work with light, even pressure in one direction, checking your progress frequently. Follow up with progressively finer polishing steps to restore clarity and gloss after sanding.
This technique is best reserved for isolated problem areas, not entire panels.
5. Apply Paint Protection Film (PPF) on High-Impact Areas
Wax and sealants protect against UV and minor contamination. PPF (also called clear bra) is a thick, self-healing thermoplastic urethane film that protects against stone chips, road debris, and minor abrasions — physical impacts that no coating can stop.
You don’t have to wrap the entire car. Many enthusiasts apply PPF to high-impact zones: the hood, front bumper, fenders, mirror backs, and leading edge of the roof. Pre-cut kits are available for most vehicle models, making DIY installation more accessible than ever.
6. Layer Your Protection: Sealant + Wax
You don’t have to choose between a paint sealant and a carnauba wax — use both. Apply a synthetic paint sealant first as your foundation layer (it bonds better to bare paint), allow it to cure fully, then apply a carnauba wax on top.
The result? The sealant’s durability combined with the warm, deep, wet-look glow that only carnauba can deliver. This “topping” technique is popular in the show car community for a reason — the visual depth it creates is genuinely stunning.
7. Ceramic Coat Your Glass and Wheels
Most people ceramic coat their paint and stop there. But applying a SiO2-based ceramic coating to your glass and wheels transforms maintenance.
On glass, it creates a hydrophobic layer so water beads and sheets off at highway speeds — dramatically improving wet-weather visibility. On wheels, it prevents brake dust from baking on, making cleanups a 30-second rinse rather than a 20-minute scrub.
Use a dedicated glass ceramic or wheel-specific formula rather than paint coatings, which can create dangerously slippery glass in some formulations.
8. Detail the Engine Bay — Carefully
A clean engine bay signals a well-cared-for vehicle and makes it far easier to spot leaks or issues down the road. But you need to be methodical.
- Let the engine cool completely before starting
- Cover sensitive electronics (fuse box, alternator, air intake) with plastic bags
- Use a gentle all-purpose cleaner diluted to a low concentration — not a pressure washer
- Agitate with a detailing brush and wipe down with microfiber towels
- Dress plastic and rubber components with a non-greasy protectant once dry
Never blast a hot engine with cold water, and avoid soaking electrical connectors or sensors.
9. Invest in Proper Lighting
The single most underrated detailing tool isn’t a product at all — it’s light. Overhead garage lighting is useless for paint inspection. A dedicated swirl-finder light (a high-powered LED inspection lamp) is what professionals use to find and assess defects before, during, and after correction.
Hold the light at a low, raking angle across the surface. Every imperfection — swirls, buffer trails, water spots, missed sections — will jump out clearly. Working without this kind of lighting is essentially working blind.
10. Maintain Your Tools as Carefully as Your Car
Dirty pads ruin paint. Contaminated microfibers create scratches. Advanced detailing demands advanced tool care.
- Wash polishing pads after every use with a dedicated pad cleaner or on the gentle cycle in a mesh laundry bag
- Separate your microfiber cloths by task (paint, glass, interior) and never mix them
- Store pads in sealed bags or cases to prevent contamination
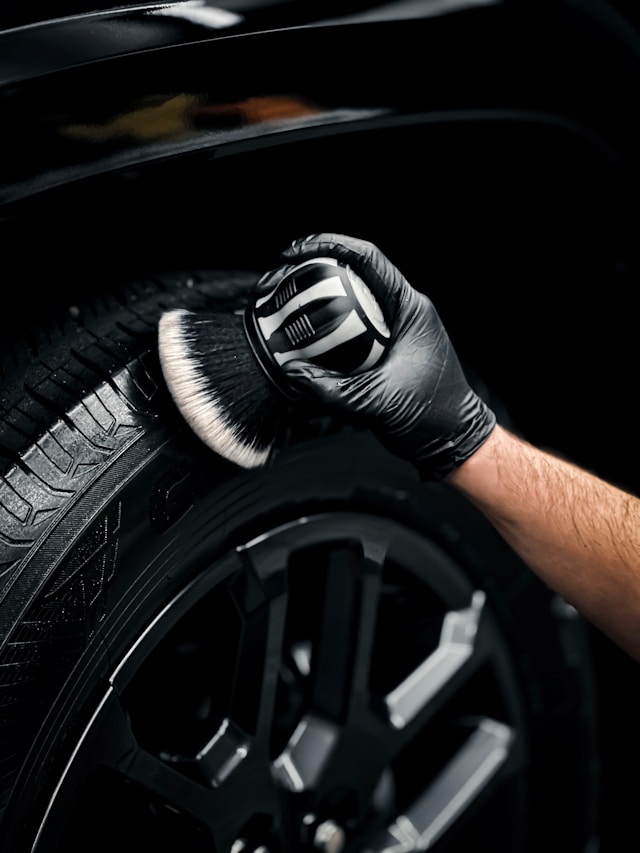
- Check brushes for hardened bristles before use — a stiff brush on delicate trim will leave marks
Your tools are an investment. Treat them accordingly and they’ll deliver consistent, professional results for years.
The Mindset of a Pro Detailer
What separates great detailers from good ones isn’t just technique — it’s patience and attention to detail. Professionals work slowly, check their work constantly under proper lighting, and resist the urge to rush. They also know when a job exceeds their skill level and when to call in a specialist.
Adopt that mindset, combine it with these advanced techniques, and you’ll produce results that genuinely rival the work of professional shops — at a fraction of the cost.
The perfect detail is out there. Go chase it.