Whether you’re a first-timer or just looking to up your game, these fundamentals will keep your car looking showroom-fresh.
Car detailing is more than a quick car wash — it’s a thorough cleaning, restoration, and protection process that maintains your vehicle’s value and appearance. The good news? You don’t need to pay a professional every time. With the right techniques and products, you can achieve professional-level results in your own driveway.
Here are ten essential tips to get you started.
1. Always Work in the Shade
Direct sunlight is the enemy of a good detail. Heat causes cleaning products and water to evaporate too quickly, leaving streaks, water spots, and residue behind. Find a shaded spot — a garage, a carport, or even a cloudy day — before you begin. Your paint, glass, and interior will thank you.
2. Use the Two-Bucket Wash Method
One of the most common detailing mistakes is washing your car with a single bucket of soapy water. Every time you dip your wash mitt back in, you’re reintroducing dirt and grit that can scratch your paint.
The fix is simple: use two buckets — one filled with clean, soapy water for washing, and one with plain water for rinsing your mitt between passes. Add a grit guard to the bottom of each bucket to trap contaminants. This small change makes a huge difference in preventing swirl marks and micro-scratches.
3. Wash from Top to Bottom
Gravity is your friend. Always start cleaning at the roof and work your way down to the lower panels and rocker panels, which carry the most road grime and brake dust. If you start at the bottom, you’ll just drag that dirt back up onto already-clean surfaces.
The same rule applies to rinsing — top down, always.
4. Dry with a Microfiber Towel, Not a Bath Towel
Regular terry cloth towels or bath towels are far too rough for automotive paint. They trap particles and drag them across the surface, creating fine scratches you might not notice until the sun hits at just the right angle.
Invest in a set of high-quality microfiber drying towels. They’re incredibly absorbent, gentle on paint, and reusable for years with proper care. For best results, gently lay the towel flat on the surface and drag it in one direction rather than scrubbing in circles.
5. Clay Bar Before You Polish or Wax
Even after a thorough wash, your paint can still feel rough to the touch — that’s contamination embedded in the clear coat (industrial fallout, tree sap, brake dust, rail dust). A wash won’t remove it; a clay bar will.
Lubricate the surface with a detailing spray or quick detailer, then gently glide the clay bar back and forth. You’ll be amazed at what comes off. Claying prepares the surface for polishing or waxing, ensuring those products bond properly and last longer.
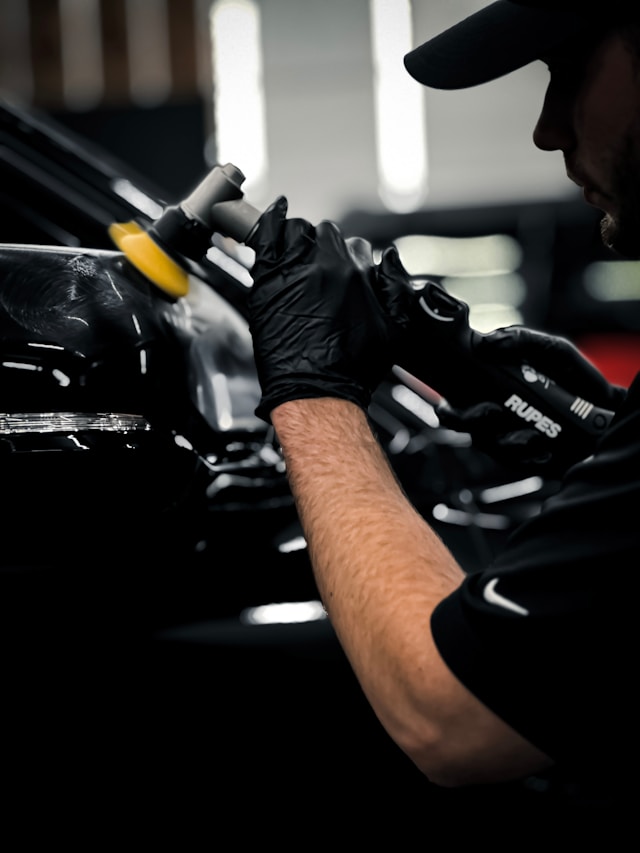
6. Polish Before You Protect
Wax and sealants protect paint — they don’t fix it. If your paint has light swirl marks, oxidation, or fading, polishing is the step that actually corrects those defects. A machine polisher with a light cutting compound will remove the damaged top layer of clear coat to reveal fresh, glossy paint underneath.
If the paint looks good, you can skip polishing. But if not, always polish before applying any protective layer.
7. Don’t Forget the Wheels and Wheel Wells
Wheels are often the dirtiest part of the car — baked-on brake dust, road tar, and grime accumulate fast. Use a dedicated wheel cleaner (pH-neutral for coated or chrome wheels) and a set of wheel brushes to get into every spoke, lug nut, and barrel.
Clean wheels make an enormous visual difference, and sealing them afterward with a wheel wax or ceramic coating will make future cleaning much easier.
8. Clean Interior Surfaces in the Right Order
Just like the exterior, interior detailing follows a logical sequence: top to bottom, dry before wet. Start by removing loose debris with a vacuum, then work on vents, dashboard, and door panels with a soft brush and interior detailer before moving to lower surfaces and floor mats.
Avoid using silicone-based dressings on your dashboard — they create glare on your windshield and attract more dust over time. Opt for a matte-finish interior protectant for a cleaner, more natural look.
9. Use Glass Cleaner on All Windows — Inside and Out
The inside of your windshield gets a surprising amount of haze from off-gassing plastics, cigarette smoke, and skin oils. Use an automotive glass cleaner (avoid ammonia-based products on tinted windows) and a clean microfiber cloth.
Fold your cloth into quarters so you always have a clean face to flip to, and wipe in overlapping passes. Finishing with vertical strokes on one side and horizontal on the other helps you identify any streaks you’ve missed.
10. Protect Your Work with a Quality Wax or Sealant
All that hard work deserves a protective topcoat. A carnauba wax gives a warm, deep shine and is perfect for show-car enthusiasts. A synthetic paint sealant lasts longer (typically 4–6 months) and offers stronger protection against UV rays and environmental contaminants. Ceramic coatings go even further, offering years of protection with a single application.
Whatever you choose, apply in thin, even layers and always follow the manufacturer’s instructions for cure time.
Final Thoughts
Great car detailing isn’t about expensive products — it’s about the right technique and working methodically. Master these fundamentals, and your car will consistently look like it just rolled out of the dealership. Start with these ten tips, build your product kit gradually, and enjoy the satisfaction of a car that truly shines.
Happy detailing!